

Halloween Tricks & Treats
- Aug 30, 2021
- 3 min read

It might seem a bit early to be busting out the Halloween decor but since my shop operates on a preorder schedule, I have to come out with seasonal items super early so your kids have plenty of time to play before the holiday passes. I've been trying to come up with easy and inexpensive crafts for your kids to do mostly on their own so I have a super fun printable for Halloween that you can download by clicking here. You can view the rest of my fall and Halloween collection by clicking here.

There are 4 different art prints that come in 3 different sizes. Although these are designed to fit the insertable frames (click here to purchase), you could definitely make your own frames or just create a wall hanging using coffee stirrers (click here to view that tutorial).

I prefer to print the artwork on cardstock; if you're not using the insertable frames, you'll need to cut off an extra eighth of an inch on the right side.

You also get 2 magic books. I prefer to print these on regular printer paper for greater flexibility.


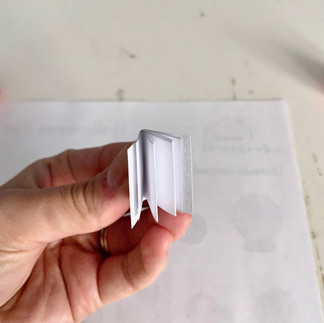


To make the books, cut out the cover and page insert on the solid lines (Picture 1). Fold the cover in half (Picture 2). Accordion fold the page insert along the dotted lines (Picture 3). Use a glue stick to apply to the inside of the cover (Picture 4). Glue the page insert into the cover (Picture 5). Pinch between your fingers for a few seconds (Picture 6).

Now you have 2 mini magic books that pair well with my crystal ball and potion bottles. This is also a super easy craft for littles to work on with minimal help from mom.

Your doll needs a special bag to go trick or treating, and this one works great. I prefer to print this on regular printer paper because you'll need to make lots of folds.


Start by cutting the bag template out on the solid lines (Pictures 1 and 2) and fold on all the dotted lines (Picture 3).


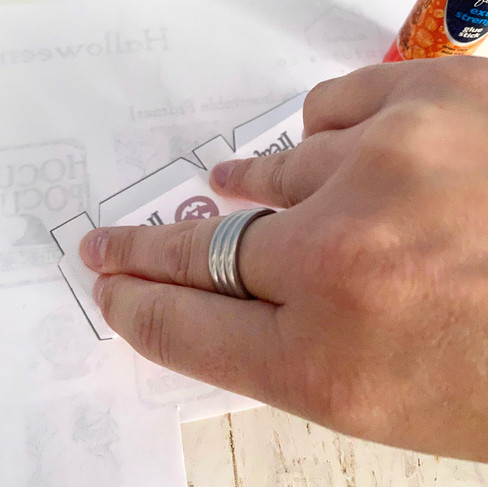


Use a glue stick to add glue to the back of the top tab that has the dots on it (Picture 1). Fold the top tab over and press (Picture 2). Apply glue to the 2 square tabs and tiny tab on the side (see where my fingers are pointing on Picture 3). Fold the bag up and secure the side tab. Use a small piece of double-sided tape to secure the bottom tabs (Picture 4).


Use something sharp like a safety pin or paperclip to poke through the 4 dots at the top of the bag (Picture 1). Insert string through the front of one of the holes (Picture 2). Knot the string several times on the inside so it doesn't come back through the hole and cut off the excess string (Picture 3). Make your string extra long and insert it through the other hole on the same side. Knot it at the length you want the handle (Picture 4). Repeat on the other side, making sure the second handle is the same length as the first.

You have a tiny trick or treat bag ready to fill with mini goodies. I would love to see if anyone decides to make mini candy bars.

I know I'll get questions about my pumpkins, especially since I'm not selling any. The small pumpkins are just from a bag of fall vase filler I got at Hobby Lobby and I painted them. The larger pumpkins are from the dollar store. They were a super bright orange color, but I just gently removed the stems, painted them, and reattached the stem. That would be another easy and fun project for a kid. My kids love any excuse to bust out the paint.

Be sure to tag me on Instagram @mini.adentures.co so I can see your spooktacular Halloween dollhouses..


Comments