

A Schoolhouse Rocks Adventure: September 2022 Subscription Box
- Sep 12, 2022
- 3 min read
Updated: Mar 8, 2023

It's time for the second Mini Adventures Co. subscription box! Kids are heading back to school so I thought it would be fun to get them excited for reading, writing, and arithmetic by having their dolls go back to school, too.

Your box includes a DIY Kit for a vintage style school desk (we'll get to the tutorial in just a minute) and a bag with the accessories (a reversible chalkboard/bulletin board, a backpack, a notebook, tablet, and pencils).


The notebook, tablet, and pencils are just the right size to fit in the backpack. Please be extra gentle with the snap button of the backpack. With repeated use, this could easily be damaged. Encourage your child to be super gentle with this part. If the button becomes loose or comes off, use a small dot of hot glue to repair it. The backpack can even been worn as long as you use the straps gently.
I love pieces with more than 1 function so I included a stand that has a chalkboard on one side a bulletin board on the other. The chalkboard was painted with real chalkboard paint so your child can actually draw on it with chalk and erase with a damp cloth.

I have a Study collection in my shop that has lots of fun items for kids that love to play school. Check it out here.

When designing the subscription boxes, I work hard to design a box that can be played with independently of a dollhouse so you can play, even if you don't actually own a dollhouse.. If you wanted your child to bring it with him or her outside the house, you could purchase a Travel Dollhouse suitcase. Let's get started on the super easy DIY Kit assembly.

Your DIY Kit comes with all the materials you see above:
-2 side panels
-3 cross supports
-backrest
-bench seat
-desk top
Other items you will need to complete the assembly:
-craft glue that works on wood
-super glue
-sandpaper
-paint or stain (optional)


If you don't care for the burned look of the wood (the laser cutter does that), you can start by lightly sanding the wood pieces. If you plan to stain the desk, you'll also need to sand the wood. If you plan to paint, I would paint the wood pieces before assembly, and a coat of primer would help cover the burned marks so they don't bleed through the paint.


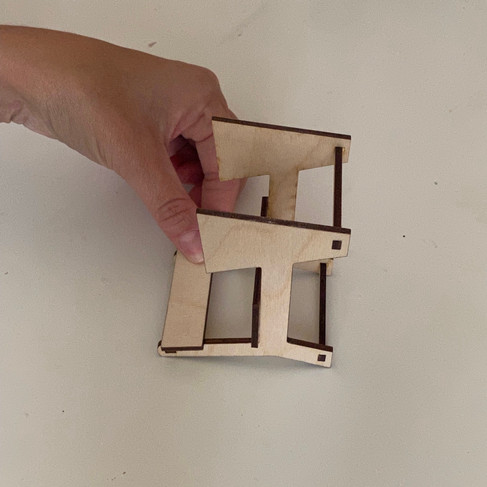
Add the cross supports to one of the side panels. They should slide in easily. To hold them in place better, use a small drop of super glue to act as a sort of "weld." Allow the glue to set for a couple of minutes.


Flip the desk over and insert the cross supports into the other side panel. Repeat the "welding" process with super glue. Allow the glue to dry for a few minutes.


Add the bench seat by applying a line of craft glue in the spots you can see in the first picture above. Press the seat into place. It should overhang the side panels by an 1/8 of an inch on each side.


Lay the desks shown above and apply glue to the area where the backrest will go. Press the backrest into place and allow the glue to dry. This piece will also extend beyond the side panels by an 1/8 of an inch.


Turn the desk upright and apply glue to the side panels where the desktop will go. Press the desktop into place and allow the glue to dry completely.

Now you have a vintage style desk ready for learning. Maileg mice are a great fit for my miniatures.

Be sure to share your subscription box adventures and tag me on Instagram @mini.adventures.co for a chance to win a store credit of $25. Happy playing!


Comments