A Happy Camper Adventure: March 2023 Subscription Box
- Jackie Anderson

- Mar 12, 2023
- 3 min read

The cold months of winter are over, and it's time to celebrate warmer weather by getting outside. This month's subscription box is all about having fun outdoors with a little camping scene. If you follow my stories on Instagram, you know that we have a small ranch we love to visit when we get a chance. We absolutely love to camp and be in nature so Lost Boys Ranch is definitely our family's happy place. This month's subscription box was inspired by our camping trips. Let's get the breakdown on what's included and how to maximize fun.

This month's box includes a a super easy DIY Kit for a darling little tent and a bag of accessories for a cozy campfire. If you're new here or stumbled across this post by accident, you can click here to learn more about The Mini Adventure Club, a small world play quarterly subscription box for kids.

I designed the campfire so that your child can redo it as many times as he or she likes. If you're looking for a more permanent solution, you can always hot glue the pieces in place.

Your campfire bag includes:
-sheepskin blanket
-black felt base
-rocks
-logs
-2 roasting sticks

We all know that campfires are the best part about camping. Campfire hot dogs are a million times tastier than grilled hotdogs, and what camping adventure isn't complete without gooey, messy s'mores? For your kiddo to set up his or her campfire, just lay the black felt base down, place the rocks around the base, and put the logs in the middle. Like I said earlier, you can use hot glue if you want to keep the logs in the teepee formation I show.

I think it would be so much fun for the kids to create their own s'mores and hot dogs out of felt or play-dough. With play dough, you could just stick the pieces right on to the end of the stick. I used double-sided tape to get my Maileg mice to hold the sticks. Now that your dolls have enjoyed some yummy food, it's time to set up the tent for the night.

The DIY Kit includes:
-2 tent frames
-3 cross beams
-felt
You need to provide:
-hot glue gun
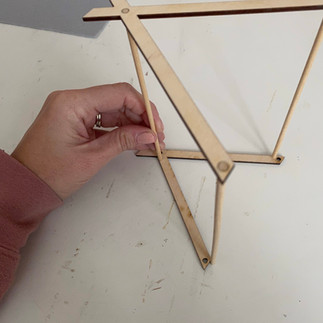
If you don't like the look of the burned wood (this happens on the laser cutter), you can start by sanding the 2 frame pieces (first photo). Personally, I think the tent looks good with the burned wood, but you do you. Lay out one of the frame pieces, and insert the 3 cross beams into the holes (second photo). It should be a snug fit but not too hard to insert. If you feel like it's too loose and you don't plan to take apart your tent, you can always use super glue or craft glue to hold everything in place. Lay out the other frame piece, and insert the cross beams into those holes to create frame of the tent (third photo).
Lay the felt out and add the frame on its side on top of the felt so the felt extends out about three-fourths of an inch (first photo). Apply a line of hot glue to the felt next to the cross beam (second photo). Fold the felt over the cross beam and press it into the hot glue (third photo).
Turn the frame to the other side and repeat the hot glue process for that side. Make sure to pull the felt so it's stretched tightly.

Now you have a tiny tent ready for a night of camping under the stars.

Set up your tent with a cozy sheepskin blanket and grab all the fixings for roasting s'mores around the campfire.

I hope you love this spring box as much as my kids do! I also hope this box encourages you to take your kids on their own camping adventure, even if it's just in the backyard. Make sure to take along your mini camping scene. Be sure to tag me on Instagram @mini.adventures.co and use #miniadventureclub!


Comments