

Barn Light Tutorial
- Apr 7, 2020
- 2 min read

One of my post popular images on Pinterest is the study from The Emma Dollhouse, which is a custom Hearth and Hand farmhouse I worked on for a friend's daughter. She had several pieces of vintage dollhouse furniture, and I was so excited to use these pieces in this project, including the desk and chair in this study. To go with the farmhouse vibe of the rest of the dollhouse, I thought it would be fun to make a barn light to go above the bulletin board. You only need a few materials, and it doesn't take long to make. Let's get crafting!

Materials:
-Wood doll pin stand (they come in a pack in the wood craft section of Hobby Lobby)
-Wood axel dowel caps (also come in a pack in the wood craft section of Hobby Lobby)
-Wooden circle (I used the center of a mini hoop wreath, but Hobby Lobby has tons of small wood circles in the wood craft section)
-Aluminum rod (found in the model car section at Hobby Lobby)
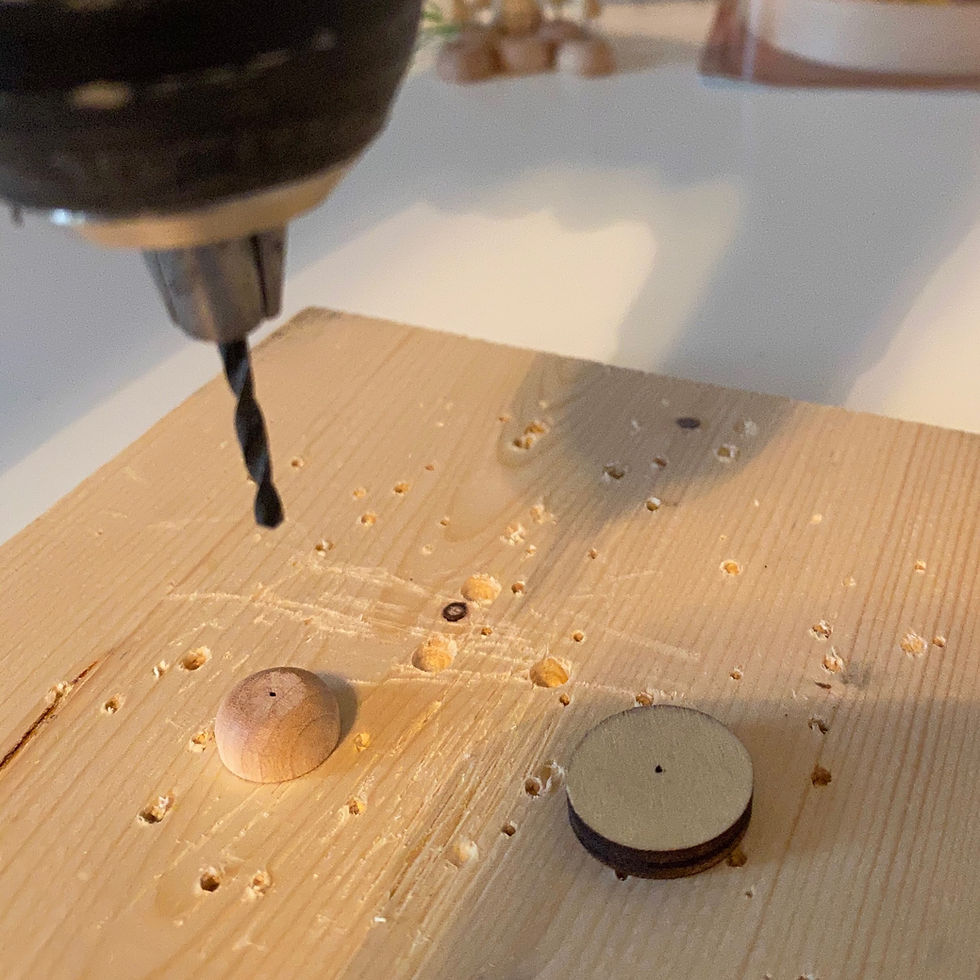
Start by drilling holes in the centers of the dowel cap and the wood circle. I used a 3/32" drill bit because that matched the diameter of the aluminum rod I used.

Now you can shape the aluminum rod for your light. I used a section that was a few inches long, and you can use wire cutters to trim off any excess after you've shaped it. I made the curved portion of the rod by wrapping it around a small glue stick.

I used pliers to create the 90 degree bend.

Now that all your components are ready, it's time to assemble the light. Slide the dowel cap on to the rod and secure it with a couple dots of super glue on the under side (so no dried glue is visible on the finished light).

Insert the rod through the hole in the wood circle and secure it with a little bit of super glue smeared on the back.

Then, insert the doll pin stand over the dowel cap. The dowel cap should just fit inside, and super glue the dowel cap to the doll pin stand from inside the doll pin stand.

You now have an assembled barn light. Let the super glue completely dry before painting it.

Once the glue is dry, the light is ready for spray paint. I secure mine to a piece of painter's tape so it doesn't fall over while I'm spraying it.

Use flat black spray paint to evenly coat the barn light. Be sure to spray from all angles, and you should be good to go after 2 coats of spray paint.

Now you have a beautiful barn light to install in your dollhouse. I recommend attaching the light with super glue or craft glue. I've mounted them on either side of the door of Lucy's first dollhouse, and I also plan to use it above the sink in my latest IKEA dollhouse I'm working on to stage the products I sell.


Comments