

DIY Kit: Arch Dresser
- Jun 17, 2021
- 3 min read

I painted an IKEA Tarva dresser for my office for the soul purpose of staging photos. When checking out some inspo on Pinterest, I found this awesome company that makes fun legs for IKEA furniture, and I fell in love with these metal arched legs. They were out of stock when I was painting my dresser so I didn't get them in real life, but it seemed like such a fun thing to make for a dollhouse. To purchase the DIY Kit, please click here for the double and here for the single. You can also order the assembled versions from the same links. Let's get started with assembly.

Your kit includes everything you see in the above picture. The assembly of the single and double dressers is the same except the single has shorter panels for the base, top, front, and back.
-base panel
-2 side panels
-back panel
-front panel with etched drawer fronts
-top panel
-2 arch legs
-4 handles
You will need to supply the following items:
-craft glue
-220 grit sandpaper
-paint, spray paint and/or stains in colors of your choice
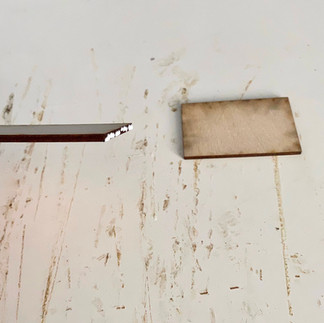
If you plan to stain or leave the dresser unfinished, use a fine grit sandpaper to sand away the burn marks on the front of each piece. If you plan to paint the dresser, I recommend doing so after assembly.


Apply a thin line of craft glue to the short edge of each side of the base (see second picture above). Attach the base to one of the side panels (see third picture above). Attach the other side panel to the other side of the base. Allow the glue to set for a few minutes.


Turn the base and side panels on its side. Apply a thin line of glue around the exposed edges (see first picture above). Attach the back panel, and repeat on the other side for the front panel (make sure the etched drawer fronts face outside). While the glue dries, I recommend using a heavy book to hold everything together (you can see from the third picture above I use The Complete Works of William Shakespeare).


Apply a line of glue to the top edges of the dresser and attach the top panel (see first picture above). There should be about a sixteenth of an inch overhang. If you plan to paint the dresser, this is the time to do it. The paint will seep into the etched drawer fronts so use something sharp like a safety pin to scrape the glue out right after you paint. You can see from the second picture above what a difference that step makes to ensure your drawer lines are visible.


I forgot to take pictures of the next step, but it's super easy. You need to paint the hardware and legs. I recommend spray painting to give a smooth finish that really looks like metal. If you're spray painting, stick the hardware on some painters' tape so the force of the spray doesn't make your hardware fly away. Apply a couple small drops of glue to the back of each handle and apply it to the dresser so the etched lines of the drawer and handle line up (see second picture above). Repeat for the rest of the handles.


To attach the legs, decide on how much clearance you want between the bottom of the dresser and the floor. I make the assembled versions with a quarter inch of space. Find something you can rest the dresser on that has that measurement. You can see from the first picture above that I used a scrap piece of book with a quarter inch thickness. Anything will work here as long as you're consistent. You could even use a pad of sticky notes. Apply glue to the arch leg, making sure to leave glue off the bottom parts that won't attach to the dresser (see second picture above). Attach your leg to the dresser, and repeat on the other side while the dresser is still propped up.. Allow the glue to dry completely before removing your scaffolding.

You have a finished arch dresser ready for your dollhouse! Make sure to tag me on Instagram @mini.adventures.co to show me how you customized your dresser.


Comments