

Back to School
- Jul 29, 2021
- 2 min read

I cannot believe another school year is about to begin. The summer just flew by, but I supposed it's time to start thinking about school again. I thought it would be fun to offer some new items in my Study collection, beginning with a digital download that includes a calendar, 3 colors of composition notebooks, a file folder, bulletin board accessories, and art prints. You can purchase the download here and view the rest of my Study collection here. These are quick and easy DIY projects that your little ones could complete with little to no help. Maybe if their dolls get ready to go back to school, then they'll be ready, too. It's worth a shot, right? I recommend printing 2 copies, one on cardstock and one on regular printer paper. Items like the calendar, file folder, and art prints are better suited to cardstock, while items like the composition notebooks and bulletin board notes are better on regular paper.

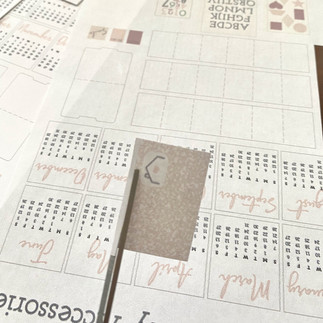
I made some fun accessories that are compatible with my heart bulletin board, which you can purchase here.


Simply cut out the little notes and attach to the bulletin board with tiny pieces of double-sided tape. For a customized bulletin board, you can purchase sticker letters at any craft store.

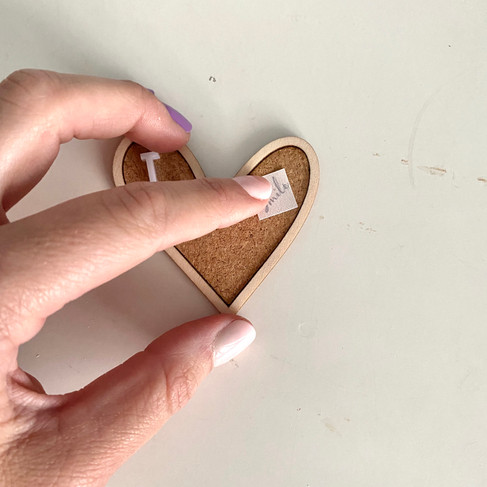
The art prints have been designed for my insertable frames, which you can purchase here.


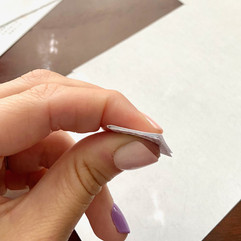
If you will not be using the insertable frames, simply cut out the prints along the gray lines. You could make your own frames using coffee stirrers (you can find a tutorial for that here). If you plan to use the insertable frames, you will see the print extends slightly to the right of the gray line so you'll cut there (check out the first photo above). Then, the print slides in and out of the frame.

I think the composition notebooks are my favorite! I love that they have real pages that your child can open and write in (you can purchase tiny pencils here or click here for a tutorial on how to make your own).


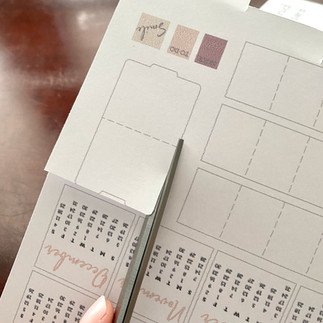
Cut out the covers and fold them in half. Cut out the inserts along the solid line.


Accordion fold the insert along the dotted lines.

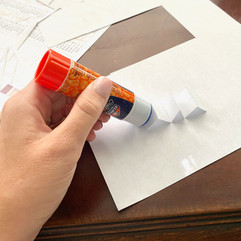


Use a glue stick to apply glue to the 2 end pages that will attach to the cover. Place the insert inside the cover and pinch with your fingers to secure the insert to the cover.


Now you have an opening composition notebook with blank pages. Repeat the process for the 2 other covers.


For the file folder, cut out along the solid lines and fold along the dotted line. I think this would be so fun if it was printed on fun scrapbook paper or the template could be traced onto a fun paper.

For the calendar, simply cut out the months along the gray lines. Since this is something your child can change out each month, I recommend using something like a mini clothespin mounted on the wall.

Now the dolls are ready for a new school year. I hope your little ones are ready, too!

Be sure to tag me on Instagram @mini.adentures.co so I can see your DIY projects in your tiny studies.


Comments